Are you ready to take your dessert game to the next level? Key Lime Pie Bars are the perfect mix of tangy and sweet, making them a treat everyone will love. I’ll show you how to make these bars easy and delicious with simple steps and tips. From a crisp crust to a creamy filling, let’s dive into the delightful world of Key Lime Pie Bars!
Why I Love This Recipe
- Bright and Tangy Flavor: The combination of fresh lime juice and zest creates a refreshing tartness that is simply irresistible.
- Easy to Make: With simple ingredients and straightforward steps, these bars come together quickly and effortlessly.
- Perfect for Any Occasion: Whether it’s a summer picnic, birthday celebration, or holiday gathering, these bars are always a crowd-pleaser.
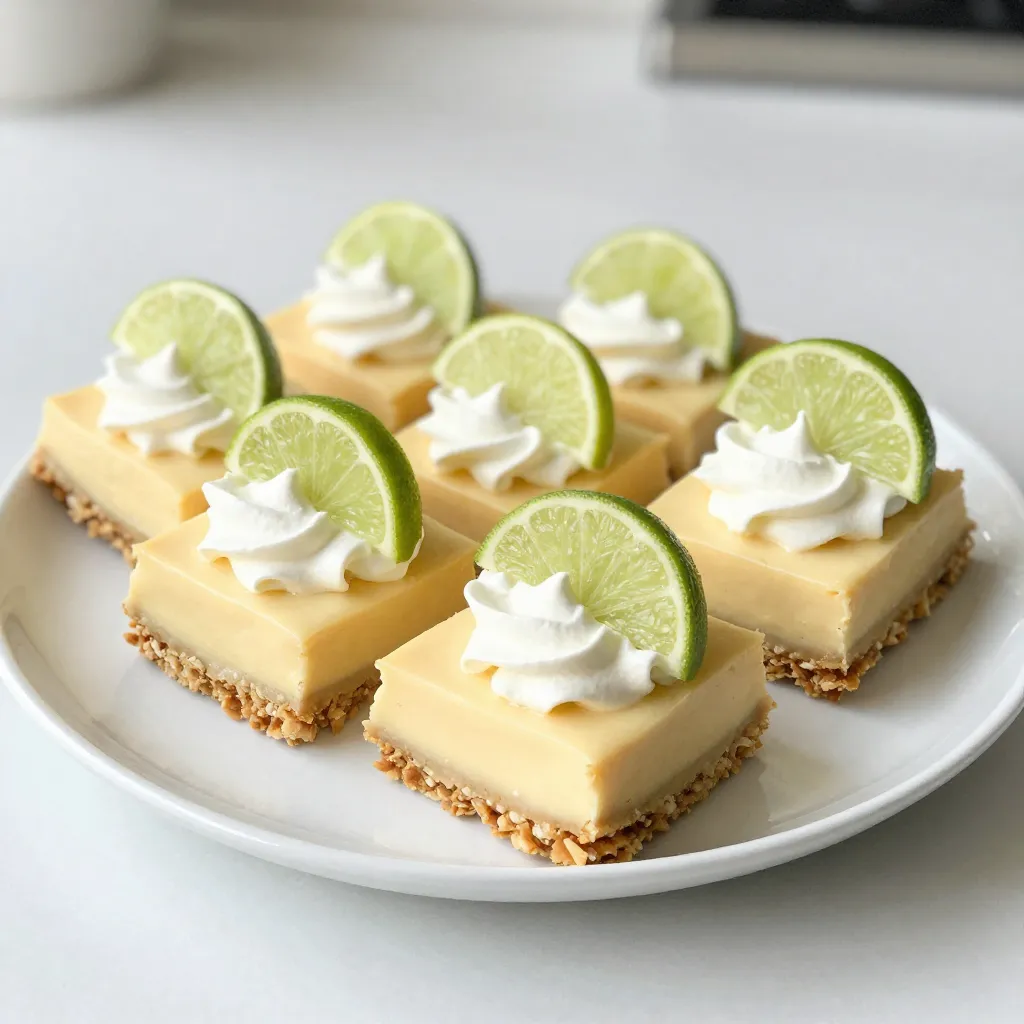
- Garnish for Extra Flair: A dollop of whipped cream and a slice of lime not only enhance the flavor but also make for a beautiful presentation.
Ingredients
Key Ingredients for Key Lime Pie Bars
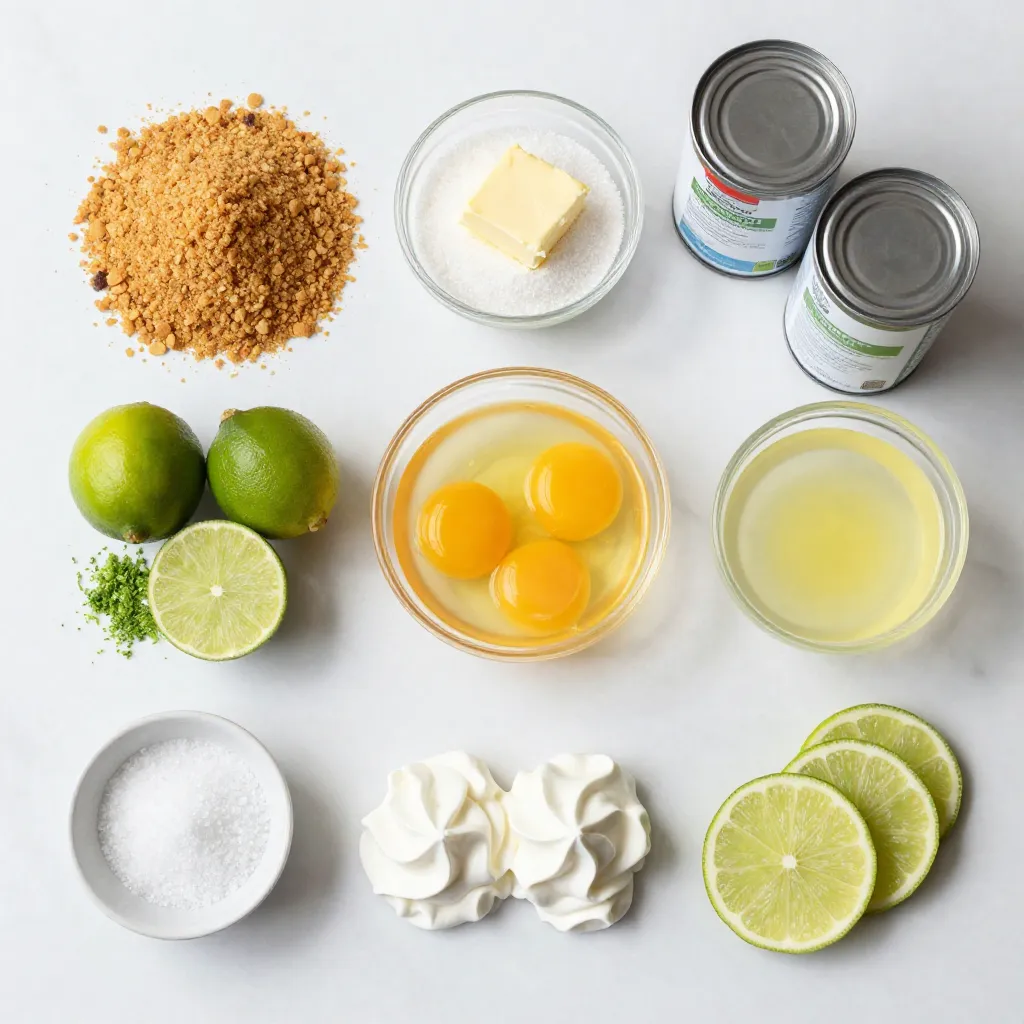
To make these bars, you need key ingredients that create the perfect flavor. Here they are:
– 1 1/2 cups graham cracker crumbs
– 1/4 cup granulated sugar
– 1/2 cup unsalted butter, melted
– 2 (14 oz) cans sweetened condensed milk
– 1/2 cup fresh lime juice (about 4-5 key limes)
– 1 tablespoon lime zest
– 3 large egg yolks
– 1/4 teaspoon salt
These ingredients work together to form a sweet and tangy treat. The graham cracker crust gives a nice crunch, while the lime filling bursts with freshness.
Optional Garnishes
For a fun touch, add garnishes when you serve your bars. Here are a few ideas:
– Whipped cream
– Lime slices
These simple additions enhance the look and taste of the bars. A dollop of whipped cream adds creaminess, while fresh lime slices bring more zing.
Ingredient Substitutions
You can swap some ingredients if you need to. Here are some ideas:
– Use honey instead of sugar for a different sweetness.
– Substitute regular limes for key limes if you can’t find them.
– Use a gluten-free graham cracker for a gluten-free option.
These changes can offer new flavors while keeping the dish delicious and fun. Feel free to get creative with your ingredients!
Step-by-Step Instructions
Preparing the Crust
First, preheat your oven to 350°F (175°C). Grab an 8×8-inch baking dish and line it with parchment paper. Leave some paper hanging over the sides. This helps you lift the bars out later. In a medium bowl, combine 1 1/2 cups of graham cracker crumbs and 1/4 cup of granulated sugar. Pour in 1/2 cup of melted unsalted butter and mix until it looks like wet sand. Press this mixture into the bottom of the dish firmly. Bake it for 10 minutes until it’s set and golden around the edges. Let the crust cool completely.
Making the Lime Filling
While your crust cools, it’s time for the zesty filling. In another medium bowl, whisk together two cans of sweetened condensed milk, 1/2 cup of fresh lime juice, 1 tablespoon of lime zest, 3 large egg yolks, and 1/4 teaspoon of salt. Make sure the mix is smooth. Once your crust has cooled, pour this creamy lime filling over it. Spread it evenly with a spatula.
Baking and Chilling the Bars
Return the dish to the oven and bake for 15 to 20 minutes. The filling should be set but still jiggle slightly in the center. After baking, take it out and let it cool to room temperature. For the best taste, chill the bars in the fridge for at least 2 hours. When ready to serve, lift the bars out using the parchment. Slice them into squares or rectangles. Top each bar with whipped cream and a lime slice for a fresh touch. Enjoy your refreshing treat!
Tips & Tricks
How to Achieve the Perfect Crust
To create a perfect crust, use fresh graham cracker crumbs. I recommend crushing the crackers yourself for the best flavor. Mix them well with sugar and melted butter. This step is key. Press the mixture firmly into your baking dish. Bake it until it’s slightly golden. Let it cool completely before adding the filling. This ensures a strong base for your bars.
Tips for a Creamy Filling
For a creamy filling, use quality sweetened condensed milk. Whisk the lime juice and zest into the milk thoroughly. Make sure to blend in the egg yolks and salt until smooth. This mixing helps create a light and airy texture. Avoid over-mixing once you add the eggs. A gentle hand keeps the filling creamy without adding air bubbles.
Serving Suggestions and Presentation Ideas
For serving, lift the bars out using the parchment paper. Cut them into equal squares or rectangles. Garnish each slice with whipped cream and a lime slice. This adds color and a fresh zing. To impress guests, arrange the bars on a nice platter. Sprinkle lime zest and add mint leaves for a pop of green. These small touches make your dessert look professional and inviting.
Pro Tips
- Use Fresh Limes: For the best flavor, opt for fresh key limes instead of bottled lime juice. Freshly squeezed juice enhances the zesty profile of the bars.
- Chill Thoroughly: Allow the bars to chill in the refrigerator for at least 2 hours. This step is crucial for achieving the perfect texture and ensuring they hold their shape when sliced.
- Even Baking: To prevent the edges from overcooking, rotate the baking dish halfway through the baking time. This ensures even cooking and a perfectly set filling.
- Garnish Creatively: Elevate your presentation by adding fresh mint leaves along with the lime slices when serving. This adds a pop of color and enhances the overall freshness.
Variations
Flavored Key Lime Pie Bars
You can add fun twists to your Key Lime Pie Bars. For a berry boost, mix in fresh or frozen berries like raspberries or blueberries. These add a sweet and tart punch! You can also use flavored extracts. A hint of coconut or mint can change the whole vibe. Just a few drops can make a big difference. If you love tropical flavors, try adding crushed pineapple to the filling. This will give your bars a fun and fruity twist.
Gluten-Free Options
Making gluten-free Key Lime Pie Bars is easy. You just need to swap the graham cracker crumbs. Use gluten-free graham cracker crumbs or ground oats instead. They both work well for the crust. Just ensure the other ingredients, like sweetened condensed milk and lime, are gluten-free too. This way, everyone can enjoy these tasty treats without worry.
Adding Creative Toppings
Toppings can make your Key Lime Pie Bars even more special. Besides whipped cream, you can try toasted coconut for a crunchy bite. Add some lime zest for a fresh look and taste. If you want a little extra, drizzle some chocolate or caramel sauce on top. Fresh mint leaves also make a great garnish. They add color and a hint of flavor. Get creative and mix and match toppings to find your favorite!
Storage Info
Best Practices for Storage
Store your Key Lime Pie Bars in an airtight container. This keeps them fresh. Use parchment paper to separate layers. This way, they won’t stick together. Make sure to keep them in the fridge. The cool temperature helps maintain their texture and flavor.
How Long Do They Last?
When stored properly, Key Lime Pie Bars can last up to a week in the fridge. They taste best within the first few days. Over time, the crust may soften. If you notice this, it’s still safe to eat. Just know that the texture may change a bit.
Freezing Key Lime Pie Bars
You can freeze Key Lime Pie Bars for later enjoyment. Cut them into individual squares first. Wrap each square in plastic wrap, then place them in a freezer-safe bag. They can last up to three months in the freezer. To enjoy, thaw them in the fridge overnight. This keeps them nice and creamy.
FAQs
Can I use regular limes instead of key limes?
Yes, you can use regular limes. Key limes add a special taste. They are smaller and tarter. Regular limes will work but will change the flavor a bit. You may notice a more bitter note. If you want that classic taste, stick to key limes.
How can I tell when the bars are done baking?
Look for the filling to jiggle slightly. When done, the edges should be set. If you gently shake the pan, the center will move a bit. It should not look liquidy. The bars will firm up as they cool. Let them chill for two hours for the best texture.
What’s the difference between Key Lime Pie and Key Lime Pie Bars?
Key Lime Pie is a classic dessert in a pie crust. The bars have a similar filling but are cut into squares. Bars are often easier to serve. They have a thicker crust due to the baking style. Both offer that tangy lime flavor, but bars are more portable.
You learned how to make key lime pie bars with the right ingredients and steps. We explored special tips for a great crust and creamy filling. You also saw fun ways to change the flavor and serve these bars. Finally, we discussed how to store them and answered common questions.
Now, you can enjoy this fresh treat anytime you want. Happy bakin